Archive for the ‘Training’ Category

It Hurts So Good vs Hurts So Bad: Are You Working Hard in Belly Dance Class or Hurting Yourself?

February 4, 2013

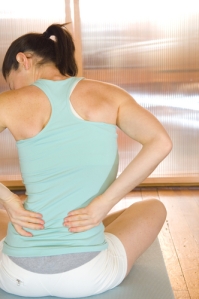
aching backAs an instructor, I sometimes hear a student (usually a beginner) say “that hurts” when learning a new movement. Keeping my students dancing safely in belly dance class is a top priority for me. When I hear this, it’s time for me ask questions and figure out whether this person is working hard in class or potentially hurting themselves. It’s moments like these when I’m glad I put in the time and effort to get a university degree in exercise science. If you have ever been in this position as a student, or an experienced dancer practicing something new, this is an important time to stop and evaluate whether what you are experiencing is a “good” hurt or a “bad” hurt.

The first thing to consider is if you (or your student) have any past or current injuries or undiagnosed aches and pains from outside of class or practice. Has your back been a little achy since you helped your friend move that couch? This may not be the time to push hard; wait a few days and see how your feel.  Get any persistent conditions  checked out and follow your doctor or physical therapist’s instructions for activity. If a doctor or therapist has given you guidelines on what to do – or more importantly, not to do – follow them. If your belly dance instructor advises otherwise, politely decline. It is not within an instructor’s scope of practice to counter these instructions and they shouldn’t put you in that position.

If  none of the these are factors, then you need to honestly ask yourself if it’s just hard. Are you just feeling your muscles working, perhaps burning a bit  when you are drilling for several minutes at a time? This is just what work feels like. Good for you for putting in the effort! It will pay off. You may be a little sore tomorrow, but it will pass quickly and your body will adapt and become stronger.

If a movement is causing a sharp or shooting pain with each repetition, or you feel your joint “sticking” or “catching” each time – this is a sign to stop and get help finding answers. You could, for example,  be dealing with an inflamed nerve,  ligaments rubbing over boney bumps or loose bone fragments in a joint. If hip movement is causing low back pain this is also a warning sign.

It isn’t necessarily something serious, however. No need to panic just yet.  You may just need to correct your alignment or where you are driving the movement from. If so, it is the instructor’s job to straighten that out. Make sure you ask for help. Be specific in describing what you are feeling and what part of the movement brings it on. If you are having low back pain or tension with hip movements, pay careful attention to how you are positioning your pelvis. Barring other back issues, this is one of the easiest “hurts” to fix in class.

If addressing these does not stop the pain, then perhaps your teacher can offer a modification or alternative movement – not all movements work on all bodies – especially as we get older.  Of course, use your judgement – only YOU are experiencing what’s going on in your body. When in doubt,  check it out – with a medical  professional.

Dance safe.. dance for life!
6 Things To Know About Stretching & Belly Dance

January 19, 2013

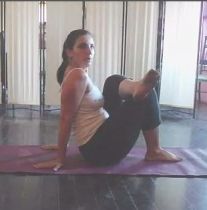
Stretch PicFlexibility is essential in belly dance. It gives us the range of motion to complete our movements with ease and grace. The field of exercise science has done quite a few flip-flops over the years in its recommendations on safe and effective stretching.  As new research emerges, these change and improve . If your main experience with flexibility exercises came from your high school P.E. class, or someone who isn’t up to date on the most current knowledge,  it may be time to re-think when and how you stretch.

  • The most common type of stretching is static stretching and this is generally considered the safest and most effective for the majority of people and their activities. In static stretching, you take the position to the point of a slight stretch, without causing pain. Hold the position for 15 to 30 seconds, breathing and consciously relaxing the muscle for best effect. This is repeated 3 to 5 times for each side.
  • Dynamic stretching, for example bouncing down to touch your toes, is not a recommended stretching method for most people.  While it does have its applications in certain sports, it is not necessary or recommended for us as belly dancers. This type of stretching can cause muscle strains and tears – stick to static stretching.
  • The American College of Sports Medicine’s exercise guidelines for the general population recommend flexibility exercises be done at least twice a week. In training for activities where range of motion is a major feature, such as dance or gymnastics, more frequent  – even daily stretching is beneficial, provided it is done following activity when the muscles are warm.
  • The muscle groups that are most likely to be tight are the hamstrings, hip flexors, calves and chest. Be sure to include them all in your flexibility routine.
  • Once upon a time, it was thought that stretching after a strenuous workout prevented DOMS (Delayed Onset Muscle Soreness). This is the kind of soreness that hits you the day after an 8-hour dance workshop and sticks around for the next two days. We now know that it won’t prevent DOMS , but it won’t make it worse either. Proper stretching after activity is always a good idea.
  • Research in the past 10 years has recommended that stretching be saved for post-workout, but that’s not the whole story. The ACSM does recommend this as a general rule, but has also stated that for activities such as dance and gymnastics, which require a high degree of flexibility in performance, some stretching should be done before activity. It still needs to be done on warm muscles however, so a dynamic warm up needs to comes first. Deep, long-held stretches are still most effective after dancing.

For a variety of stretches useful for belly dance, check out some of the Saturday Stretch “Daily Bellydance Quickies” on my YouTube channel

Putting Yourself To The Test for Dance Fitness

December 29, 2012

clipboardNew Year’s Day is right around the corner. Many people  will be making resolutions to get in shape. If one of your goals for 2013 is to improve your dancing, and your overall fitness, it’s important to know where your personal starting line is. When we know where we are now, we can accurately look back a few months from now and applaud how far we’ve come. Small successes are the very best motivators!

You could hire a personal trainer and let a pro guide you, but if that isn’t in your budget or your schedule, you can still get a read on where you are fitness-wise with a few at-home tests that require little to no equipment. You could do them all by yourself, or buddy up with a dance friend and cheer each other on.  Do be sure to write down which tests you do and your results so you can compare them to your results on the same tests a few months from now.

Doing all of these tests will give you a more comprehensive view of your strength, muscular endurance, flexibility and cardiovascular fitness, but if you are particularly interested in just a few of these areas, pick just the ones that fit your needs. Follow the links for detailed descriptions of each exercise.

MUSCULAR ENDURANCE

The Wall Sit Test

You’ll need: a wall and a timer

Holding the wall sit position tests the muscular endurance of your quads and glutes. This is an important factor in sustaining a good long shimmy!  Get in position, start the timer and stay there as long as you can with proper form. Record your results.

The Plank Test

You’ll need: floor space and a timer

Holding the plank position tests the muscular strength and endurance of all your core muscles. Nothing – and I mean NOTHING – will have as far reaching improvement on your dance as a strong core. It improves posture and balance, prevents back  injury and increases the integrity of all your movement. Start the timer, get in position and stay there as long as you can hold your body in a straight line. Be honest – no lifting or sagging! Record your results.

STRENGTH & POWER

The Push-Up Test

You’ll need:  just floor space or a wall

A strong upper body supports your dance posture and keeps your arms from drooping out of position. Depending on your current level of strength, you can choose to test yourself using a wall push up, a bent knee push up or a standard push up. How many can you do with proper form? Record your results.

The Wall Jump Test

You’ll need:  a wall, a tape measure, a partner or some baby powder (what??)

The wall jump tests how much power you can generate from your lower body. Position yourself facing an open wall so that you can jump up and touch the wall. Squat down and jump up to touch the wall at the highest point you can. A partner can mark the spot as you touch it so you can use the tape measure to record your results. If you don’t have a partner to help you, put some baby powder on your hand. This will leave a mark on the wall this is easy to wipe away once you’ve measured it. Record the best of 3 tries.

BALANCE

The Tree Pose Test

You’ll need:  floor space and a timer

Having good balance brings grace to your dance – it also keeps that sword up there where it belongs! Set your timer and get into tree pose. How long can you stay there without putting the other foot down or grabbing onto something? Record your results – on BOTH legs!

FLEXIBILITY

The Sit and Reach Test

You’ll need:  floor space, a shoe box, a measuring tape, 

The sit and reach test gauges flexibility in the hamstrings and lower back. There are a few ways to record this. If you cannot yet reach your toes, record the distance from where you can reach to the soles of your flexed feet. If you can reach past your toes, place the tape measure lengthwise down the shoe box and position your feet flat against the short end. You’ll reach past your toes and record the number of inches from your best try out of 3.

You can also do this test one leg at a time. You may find that one side is much more flexible than the other – good to know!  To do this, just bend one leg at the knee and let your knee open down toward the floor, keeping the test leg straight. Record the results for each leg.

CARDIOVASCULAR FITNESS

The Jump Rope Test

You’ll need:  jump rope and a timer

This is an alternative to the “1 mile run” test, which really isn’t for everyone. Jumping as fast as you can (which may not be fast – that’s OK), count how many times you can jump in a set amount of time. How long of a time frame is up to you.  If you aren’t accustomed to challenging cardio exercise, you might keep it to one minute or even 30 seconds. It’s not where you start, but where you go from here! Count your jumps and record your results.

Although there is plenty of norm and comparison data out there to rank fitness levels,but  I believe it’s much more important to compare yourself to YOU. Your progress is best measured from the point where you started.  Nothing else really matters. Having a realistic snapshot of you fitness at this moment will help you to figure out if your exercise routine is working to improve your dancing.

Happy & Healthy New Year to you!

The Science Behind Learning Shimmies

April 24, 2012

Learning how to shimmy is a huge challenge for many new belly dance students. Even if they come to Middle Eastern dance with several years of other dance training, most likely none of it prepared them for that small, repetitive movement that is so integral to belly dance styles.  When they sigh “HOW do you do that so fast?”, we usually tell them “Practice, LOTS of practice!”. It’s true, practice makes perfect – or at least a lot better – but what exactly is happening in our bodies in that early shimmy learning stage?

The Engine That Stalls

Remember back to your early days, instructors! New students, yes, we’ve all been where you are. You get your shimmy going and a few seconds later your knees mysteriously stop by no will of your conscious brain, You pause, then you start it back up again like an old car that stalled at a stop light. What is happening and how do you “fix” it?

Getting Under The Hood

There are a few components to learning a new movement pattern. First, you brain needs to understand what you mean to do. Second, your brain needs to get your body to cooperate – at first in a  slow and rudimentary way. In class, I ask my students if “their heads have it” meaning, they understand the movement. After all, your body doesn’t stand much of a chance if your brain doesn’t get it first. From that understanding, the body will learn it with enough perseverance. Princess Farhana cracked me up in a workshop once expressing the same idea. She said “your brain is writing checks your hips can’t cash” –  so true!

Now that your brain understands and your body can carry out the motion at a moderate speed for a short amount of time, how do we get that to grow into a sustained, smooth shimmy? This is where the body works the behind the scenes magic of neural adaptation.

Bring In The Wiring Crew

Whether it’s a shimmy or strength training, much of the early progress we see with practice is due to neural adaptation rather than actual changes in the strength or size of our muscles.  For an Egyptian knee shimmy, the quadriceps and hamstrings are the primary muscle groups we are talking about. Each of these large groups in made up of several smaller muscles and each of these has bundles of muscle fibers that work together. Each of these bundles is controlled by one nerve and that work group of muscle fibers and it’s nerve is called a motor unit. Check out the picture at the top of this post for an illustration of a motor unit.

When the neural adaptation process starts, the brain and motor units improve the speed and efficiency of their communication. We experience this as our body “cooperating” with us. On a larger scale, the motor units learn to work together in a more synchronized way. Just like a rowing crew that has all its members in perfect timing to achieve maximum speed, your muscles work best when all the motor units needed contract in unison. As the movement pattern become more familiar to our brain, our bodies also begin to recruit more motor units to do the same movement which really adds more shimmy-power.  We experience this golden moment as the “smooth, sustained shimmy”.

So is your instructor conning you when she says “Practice, LOTS of practice!”? No, absolutely not. Neural adaptation is the outcome of all that practice. It doesn’t happen from thinking about your shimmy, or wishing your shimmy would get better. The more often you practice the more positively your neural network will adapt to comply with your dreams of amazing shimmies for hours on end.

“Often” is the important key word here. Shorter daily shimmy practice will get the beginner better neural adaptation results that wrestling with it for an hour once a week. All of these things are also true for experienced dancers who are working to master a new and different shimmy than the one they’ve been doing for years.

So whether it’s your first shimmy or learning shimmy style #10, give yourself 5 minutes every day to let your body work that neural adaptation magic! Remember… “Practice, LOTS of practice!”

Warming Up to Dance

April 14, 2012

Every dance class and workshop should start with an effective warm-up. 

learn to belly danceOur warm up helps us make the transition from resting to dancing. A proper warm up can reduce the risk of injury and even asthma attacks for those who are prone to exercise-induced asthma. About 5-10 minutes is all it takes to prepare our bodies to do our best in dance class.

No matter what the activity, an effective warm up gets all the major muscle groups moving.  Some instructors use dance isolations in the warm up, and while these can certainly work as part of the specific preparation for your style, larger, multi-joint movements that aren’t typical in belly dance are also important to really get the body prepared for the rest of class.

As I’ve said so many times before in the DBQ, this is not the time for long static stretches. If an instructor leads the class in splits at the beginning of class, the only “splitting” you should do is out the door!

Some instructors leave the students to warm up on their own before class, but I have never felt comfortable with this practice because the students often simply don’t know how. Even if they are familiar with good general warm up techniques, they don’t know what you specifically have planned for the lesson. This may include lots of shoulder, back or head movements that require extra attention to those areas of the body. In my classes,  always tell my students what’s planned  as we start and any specific thing we are doing to prepare our bodies to be ready for it.

What exactly does a warm up do for our bodies?

  • An effective warm up routine increases our heart rate and breathing, which brings more oxygen to our muscles so they can do more than sit at a desk or in a car, which is probably what they were doing before class.
  • Getting all the major muscles moving increases the internal temperature of our body. That doesn’t mean we’re hot and sweaty already.  Warm muscles are more receptive to movement, especially those that use a larger range of motion that our daily activities.
  • Our joints get a lube-job.  When our body gets the cues that we’re picking up the pace of our day, it adjusts the fluid in our joints for better functioning. This is important for everyone, but especially those with the remnants of old injuries, arthritis or tendinitis issues.
  • On a less scientific level, I believe that the warm up is also a psychological transition from my students’ work day to their “me time”. It plugs their brain back into their body so they can focus on learning and the joy of moving.

Those first 10 minutes of class set the stage for the rest of the hour. Get things off to a good start, either on your own or as the instructor. Now that you know all the good things that happen to your body in the first few minutes, make sure to get there on time so you don’t miss out!

Dance For Your Life

January 28, 2012

Belly dance class at East Prince Senior Initiative

Many women who shun the gym do belly dance as their main exercise and enjoy the fitness benefits along with the fun. Unlike some forms of dance, such as ballet, belly dance is more physically accessible to most women in the general population. It also remains an activity they can safely pursue as they mature. In fact, belly dance is very well suited as exercise for maturing women.

Studies tell us that by age 75, 66% of women report no physical activity whatsoever. A certain level of fitness and range of motion is needed to perform daily activities and live independently. This doesn’t happen suddenly at age 75, but creeps up on these women starting in their 40’s and 50’s when they could be dancing against the tide of aging to prevent this.  Let’s look at some ways that belly dance can benefit mature women.

  • Belly dance is a low or no-impact activity so it protects joints that have seen some wear and tear over the years.
  • Belly dance improves balance. 30% of women at 65 and 50% of women at 75 suffer one fall per year. Dancing strengthens the muscles we use for walking and standing up straight to improve stability while moving or standing still
  • Belly dance is a weight-bearing activity so it helps to preserve bone density in the hips and legs. Fragile bones combined with impaired balance often lead to hip fractures, which are devastating and sometimes fatal in older women.
  • Belly dance helps to strengthen core muscles, protecting the spine, improving posture and reinforcing balance.
  • Belly dance is a light to moderate activity. This fills the bill for recommendations of accumulating 30 minutes most or all days of the week. This kind of conditioning helps minimize daily fatigue and shortness of breath while climbing stairs or carrying groceries.
  • Belly dance is a group activity. Staying socially engaged improves mental outlook and feelings of well-being, especially important for seniors.
  • Done on a regular basis, belly dancing at a moderate level of acitivity can help prevent or reduce the age-related accumulation of fat in the abdomen. This not only makes you look better, but improves your insulin sensitivity, warding off Type II diabetes which develops in 1 in 4 of people over 65.
  • For the 29% of women over 45  that have osteoarthritis, belly dance (and gentle exercise in general)  helps to maintain joint function. It cannot reverse joint damage, but it will not hasten it or exacerbate pain either, according to research studies.
  • As a low to moderate level of regular exercise, belly dance can lower blood pressure 8-10 mm Hg in healthy women and in those with mild hypertension. That might be just enough to keep some borderline women off blood pressure medication.

If you already dance, as many of my blog readers do, then you already know that above all it is FUN! It can also be challenging, keeping you learning new things which is good for your brain too. The beauty of belly dance as a lifetime pursuit is that it can positively change the way we age – and face it, nobody gets to stay 25 forever! It is also a dance that can change along with our bodies. Most of us will give up splits, laybacks and Turkish drops at some point, but the dance remains full of the beauty, subtlety and grace that drew us to it in the first place.

So whether you are in your 20th year of dancing or just starting out at age 50, know that you are doing something good for yourself today, and for the health of the future, more mature you.

How has your experience with belly dance changed as you have gotten older? Did you come to belly dance later in life?  How has it affected your health? Tell us in the comments below…

Taking On Your Worst Critic

December 27, 2011

Most of us know we are our own worst critics. Never is this more apparent than when we watch our own performance videos. As tough as the experience can be at first, there is a lot that can be learned and it doesn’t have to be an entirely painful, cringing experience. The first thing I suggest you do is to make a promise to yourself that you will be fair and look for the things you did well along with the things that could use improvement.

I like to view videos a few times with a different objective for each one. Depending on what you are currently working on (specific goals are good) you may choose just a few of these or come up with ideas of your own. If you’re doing more than 2 or 3, try to do it in different sittings. You can use this to evaluate improvisation or choreography.

Here are a few ideas to start:

  • Watch solely for posture. Few things can upgrade a performance as wonderfully as great carriage. Are you starting out strong and staying that way? Are you fatiguing toward the end?
  • Turn off the sound. Watch for a good mix of body variety. Are you using hips, upper body and arms? Don’t get picky on the movement quality on this one, you are looking for mix and variety. Do you use both sides of the body fairly equally?
  • Again with the sound off, watch your floor patterns. Are you using your whole space, however small or large?  Are you coming toward your “center stage” for the impressive and impactful portions of the music? Do your floor patterns have some structure – circles, travelling side to side or front to back?  Did you use any strong diagonals from back toward front?  If you are performing in a round, did you give all parts of the audience some “face time”?
  • Turn on the sound and listen for the phrasing, instrumentation and accents in the music. Did you use them effectively or pass too many of them up? If you did a good job catching your accents, did you do so with variety – some on hips,shoulders, chest, arms?
  • With sound on or off, watch just the arms. Are you keeping them moving from one interesting place to another? Do their positions have purpose (framing, showing direction, etc.)  that enhances the body line or movement?
  • Watch for the technique of each movement. Are your shapes and directions distinct? For example, do your hip ups and outs clearly look different? Are you completing each shape or movement? How is the variety?
  • If you performed with zills (yay for you!!) did you stop and start your playing in places that make sense musically? Is your timing steady? Give your self a pat on the back if you embellished on any rhythms!
  • Watch your face.  Is your expression engaged and fitting to the mood of the music, whatever it is? You don’t need the super-happy face all the time. In fact subtle, introspective moments with soft music can really draw your audience in.  Do you look like you have to think about what’s next? Does your expression truly reach your eyes?
  • On your last run through, pick your favorite moment from the performance – don’t skip this! Did you flash a great smile over your shoulder at the perfect moment?  Did you have one really elegant backbend with great arm position? Whatever it is – OWN IT –  you did it and it’s yours! Ask a trusted fellow dancer to tell you their favorite moment – you may be surprised what they pick!

Performances get better a little bit at a time. We can cultivate that progress by taking an objective and fair look at ourselves.  If you’re feeling down and need some perspective, maybe check out a video of yourself a few years back and see how far you’re come! Maybe make a resolution to tape yourself this January – no one but you ever needs to see it. Give yourself a fair critique and decide one or two specific areas to work on. A few months from now it could look very different.

How do feel about watching your performance videos? How do you use them to progress? Tell us in the comments below…

Holiday Stress – A Balancing Act for Dancers

December 3, 2011

You can balance a sword or a tray of burning candles on your head – but can you balance your life for the next few weeks? The holiday season is upon us and that means good times, good  friends and good cheer, right? Yes, but if you’re a working dancer, it can be a time of overwork and extra stress too.  You can be torn between taking advantage of the party performance season and the needs and wishes of your family and friends who want you around.  If that wasn’t enough, the physical stress of keeping up with your classes – whether you teach or are taking them – your workouts to keep you fit, and late nights performing make this a good time to talk about the antidote… rest and recovery!

Every serious dancer should have a supplemental exercise plan to keep up stamina, balance muscle strength and help prevent injury – and I hope you do! That’s what the Saturday Strength & Stretch DBQ is all about!  The schedule disruptions of holiday work and play can really throw a monkey wrench into your routine. If you’re anything like me,  when that gets disrupted, not only do I feel it physically, but I also feel guilty for “falling off the wagon”. Take a few minutes to step back and look at the larger picture. If your performance schedule is heavy for a few days,  give yourself permission to skip a day or do half the volume – for example, 1 set of each exercise instead of 2 or 3 and less cardio time. This is usually my approach on days that are just a time-crunch, even if it’s not because of lots of dancing. Some exercise is always better than none.

If you work a day job, getting up early and performing late are not an ideal mix. In a perfect world we’d all take an afternoon nap! Look ahead at your week – if you can see that early/late scenario coming up, get some extra sleep in the 2 or 3 days preceding it and plan on catching up afterwards. Rest, both as sleep and as a refrain from exercise, lets the body make those small repairs to keep you going. Just like your house or car, if you let those “small repairs” go unattended, you can count on a big one down the road. Rest is as much a strategy for injury prevention as your supplemental exercise.

The other healthy habit that falls through the schedule cracks this time of year is good nutrition. I know I haven’t touched my stove all week and it’s not because I don’t love to cook! If you know you’re the type to make a frantic run for the golden arches when you’re pressed for time, think ahead. Pre-made hummus , pita and baby carrots in my fridge have saved me more than once from fast food! Keep fruit in a bowl in your living room, and grab one on the way out the door. (I learned this from my Mom – thanks Mom!)

Got back to back gigs? Yes, you need to fuel up in between. All that dancing depletes the stored glycogen in your muscles and it needs to be replaced before you hit the stage again. What happens if you don’t? You may find yourself passed out in your dressing room after your 1 am show.  Ask me how I know this….

My solution is to keep a ziplock bag of dried apricots and raw almonds in my gig bag – and of course always some water.  The apricots  (or any dried fruit)  are a compact source of carbohydrates for energy and the protein in the almonds (or other nuts)  helps slow down the sugar rush to keep you from spiking. Of course, diabetic dancers will need to pay special attention and follow their physician’s advice.

Balance your activity and plan ahead to keep your stresses from getting the best of you. I hope you are set up for a fantastic holiday with lots of bookings and fun shows as well as  plenty of fun with your loved ones!

What stresses you out during the holidays? How do you deal with it? Tell us in the comments below…

A Technique Game for Belly Dance Class

November 2, 2011
Here’s a game to use in your belly dance class or even by yourself as part of your practice. The goal of this game is to think analytically about the properties of movement and play with the changes. I suggest using this in an intermediate or higher level class.
Any dance movement has a set of properties, for this game we will only be using three:  location, shape and plane. Let’s make sure we’re all on the same page with these…
Location – where the movement happens on the body. This could be the hips, the ribs, arms, shoulders or the whole torso.
Shape – a circle, figure 8, lift, drop, etc. (ok, these two  are more lines than shapes but you get the idea)
Plane – what is the orientation of the movement in space. It could be on one of two vertical planes, a horizontal plane or even a diagonal one.  For a visual explanation on this check here.
As an example, let’s think about a basic flat  hip circle. Its location is the hips. Its shape is a circle and it’s on the horizontal plane.
To play, one person will start by leading a movement – let’s use that flat hip circle –  and everyone will follow. The second person has to tell the group which attribute of the movement she is changing, and to what. For example,  she may keep the location (hips), and the plane (horizontal) but change the shape to a hip slide to the side.  The third person takes the properties of the hip slide and changes just one. As an example, she might keep the shape (hip slide) and the plane (horizontal) but change the location to the ribs. Now it’s a horizontal rib slide.
 Continue around the circle, changing only one property of the movement at a time. It’s a real exercise for the brain as well as a drill for basics!  I recommend not setting any counts for the next person set the change – most people don’t think well under pressure in this. Have the class keep on with the movement while the person thinks through her turn.
This works well in a practice for two, passing it back and forth, or for small or medium-sized groups. Give it a try and tell me how your class liked it in the comments below.

Another Zill Playalong!

August 25, 2011

Let’s do another zill playalong. We’ll play along with the main melody line from “Lylet Hob”. The underlying rhythm is Maqsoum, but by using a “bridge” and a variation at the end of the musical phrase we can make our playing much more musical.

Take these concepts – the bridging and phrase-ending variation – and try them out with the melodies of your favorite songs!

Lylet Hob Playalong